Create Account
A new account is created via the online form, link is on the login page of the service. The new account is created as a free subscription, if your organization already has a free subscription the online form will not work, you must order an account from our support via our secure web form.
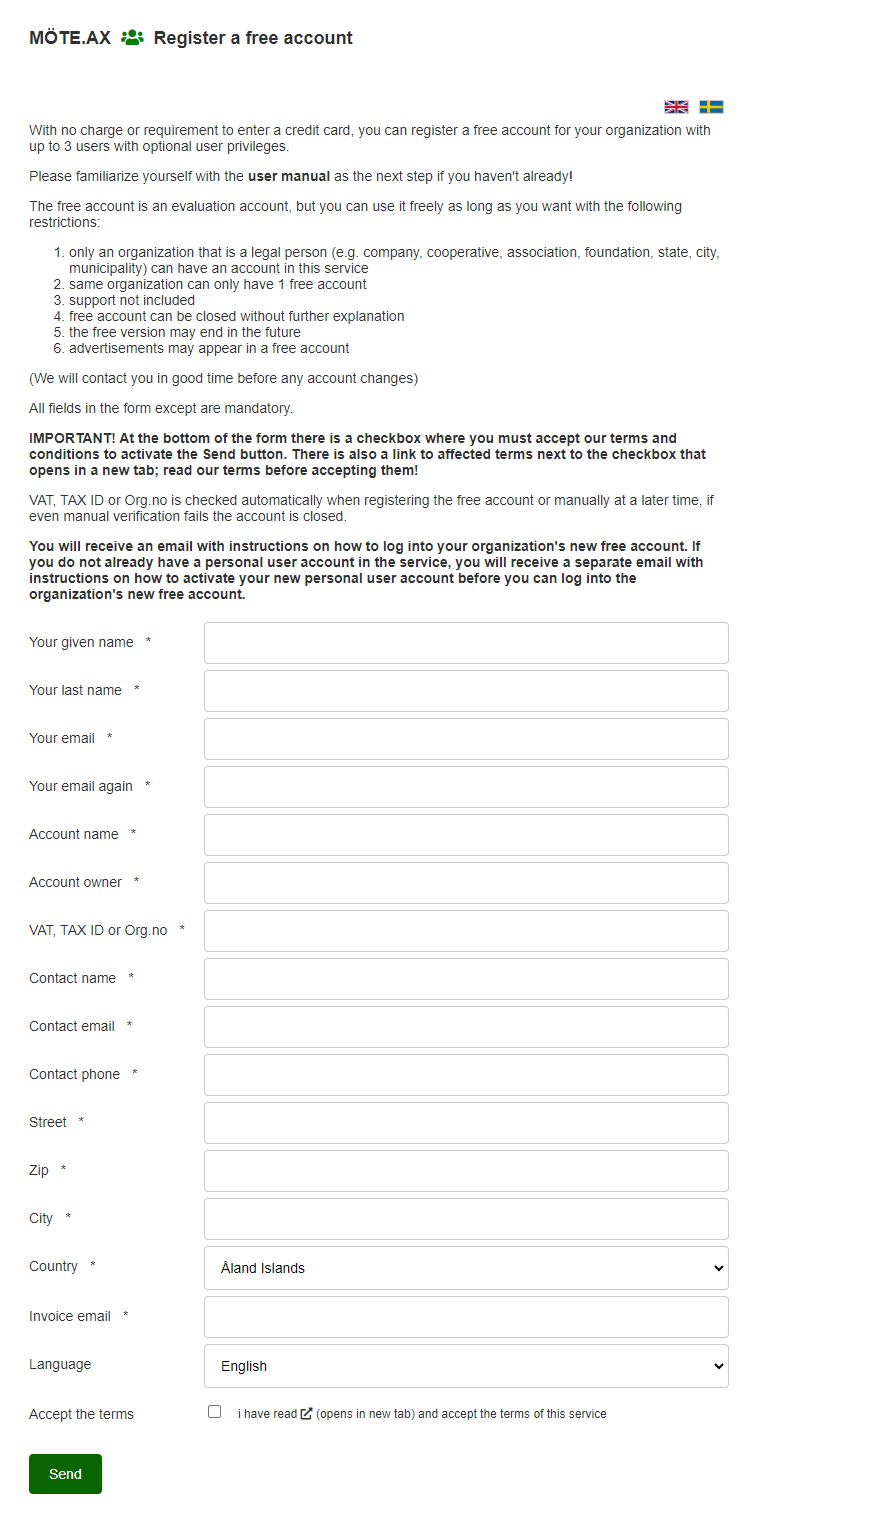
The online form
Creating a new account is easy via the online form; fill in all the fields, click "Send", you will shortly receive an email with instructions on how to complete the registration.
IMPORTANT!
Read our terms and conditions before you order anything!
Most of the form can be updated later in the control panel.
-
The field "Your email" must contain a real e-mail address that you have access to, as it is to that address that we send the instructions. The same email address must be entered in the "Your email address again" control field.
-
The email address entered in the "Your email" field is matched against the member accounts that already exist in the service, if a member account is found, it is linked to the new account with administrator rights. If a member account is not found, a new one is created with the specified email address and linked with administrator rights to the new account.
-
In the field "VAT, TAX ID or Org.no" you must enter your organization's VAT or registration number, the system checks this against official databases and also updates the field "Account owner" with the name with which your organization is registered. Even if the verification fails, the account is created but we try to verify the number manually. Only a verified organization can purchase licenses.
-
The "E-mail invoice" field must contain a real e-mail address that you have access to, as this is the address to which we send your invoices if you buy something.
-
The "Language" field applies to the account's default language in the emails and calendar invitations etc. that are sent out from the account. The members who have a different language setting log in and see the control panel in that language but receive the account's messages and invitations according to this language setting.
-
The Submit button is activated by checking the "Accept the terms" checkbox.